March 11, 2025
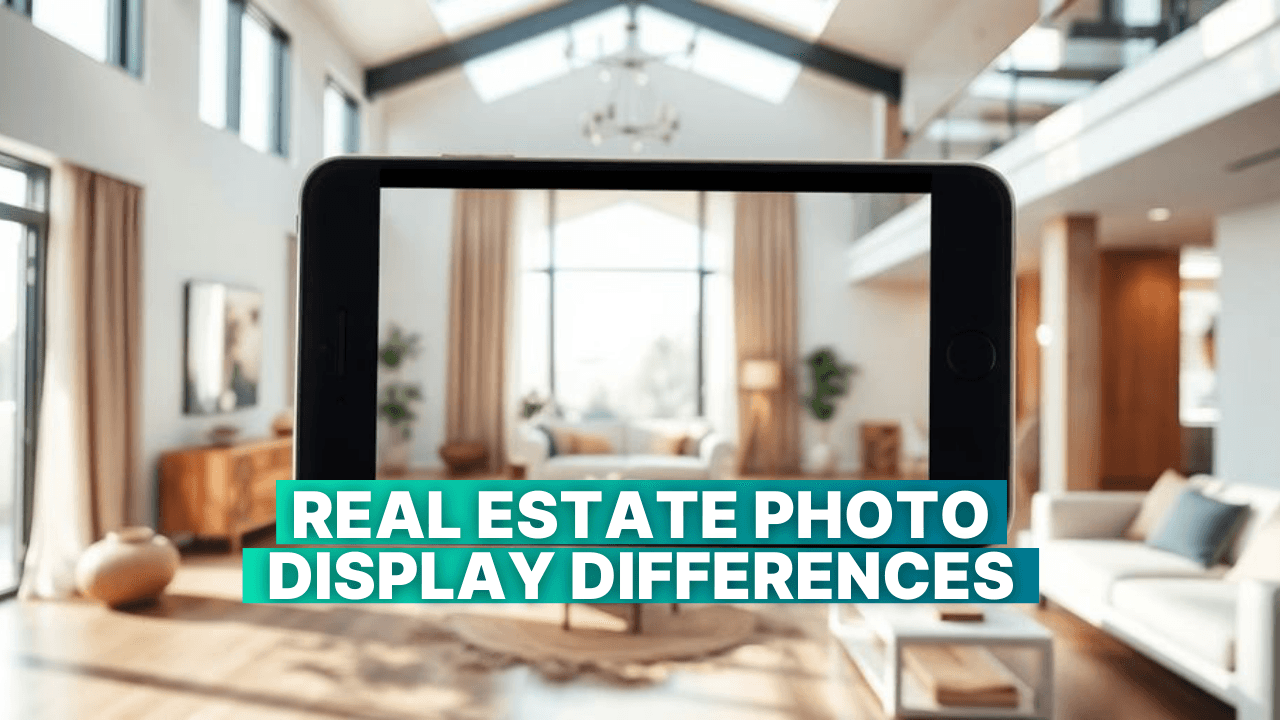
Why Real Estate Photos Look Different on Mobile vs. Desktop (And How to Fix It)
Stay Ahead in Real Estate Marketing!
Stay Ahead in Real Estate Marketing!
Stay Ahead in Real Estate Marketing!
Join our newsletter for exclusive tips, tools, and updates to transform your listings and grow your business.
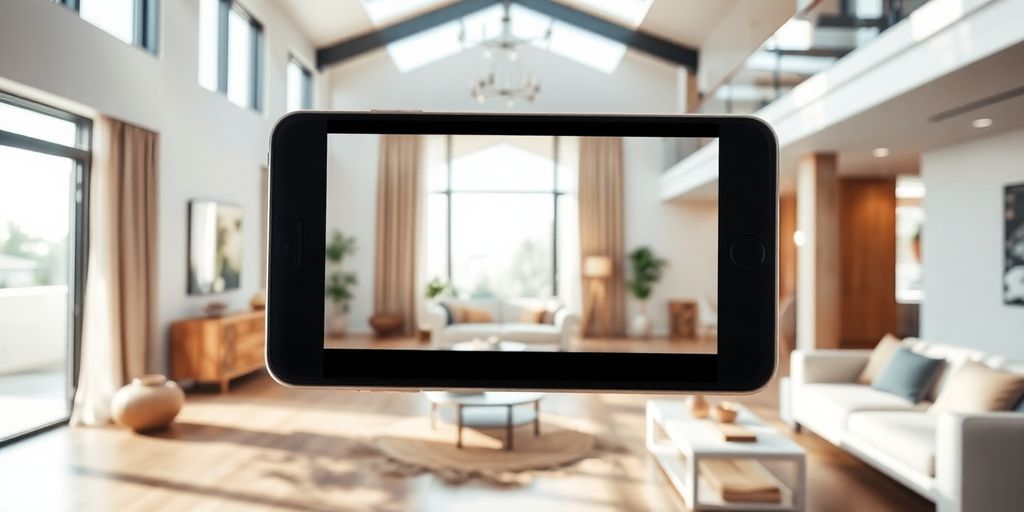
Have you ever noticed how real estate photos can look totally different on your phone compared to your computer? It’s a common issue that can confuse buyers and sellers alike. In this article, we’ll explore why this happens and share some practical tips to make sure your property images look great on any device. Let’s get into it!
Key Takeaways
Image quality can change based on device resolution.
Screen size affects how details are perceived in photos.
Editing should enhance, not mislead potential buyers.
Different platforms may require specific photo adjustments.
Lighting plays a critical role in the overall look of real estate images.
Understanding Image Quality Differences
It's super common to see differences in how real estate photos look on your phone versus your computer. It's not just you! There are a few key reasons why this happens, and understanding them can help you make sure your photos look great everywhere.
Resolution Variations
The resolution of an image plays a huge role in how it appears on different devices. Desktop screens often have higher resolutions than mobile devices, meaning they can display more detail. When a high-resolution image is viewed on a desktop, it looks crisp and clear. However, when that same image is scaled down for a mobile screen, some of that detail can be lost, leading to a softer or blurrier appearance. It's like trying to fit a lot of information into a smaller space – something's gotta give. If the original resolution isn't high enough, it may lose clarity and appear fuzzy.
Color Calibration Issues
Color calibration is another big factor. Different screens are calibrated differently, meaning they display colors in slightly different ways. What looks like a perfect shade of blue on your desktop monitor might appear more teal or even slightly purple on your phone. This is because each device interprets the color data in the image based on its own color profile. It's not that one is "right" and the other is "wrong," but rather that they're interpreting the same data differently. This is why professional photographers often use calibrated monitors to ensure color accuracy.
Aspect Ratio Discrepancies
Aspect ratio refers to the proportional relationship between an image's width and height. Images that look great on a wide desktop screen might need to be cropped or resized to fit properly on a mobile device, which can alter the composition and overall impact of the photo. For example, a wide panoramic shot of a living room might be cropped to focus on a single feature when viewed on a phone, losing some of the sense of space. When resizing an image, make sure to maintain aspect ratio.
Think of it like this: you're trying to show someone a beautiful landscape painting, but you can only show them a small section of it at a time. They're still seeing the painting, but they're missing the full picture. Similarly, aspect ratio differences can change how viewers perceive the space and layout of a property.
To address this issue:
Start with a high-resolution image.
Maintain the aspect ratio.
Check compression settings.
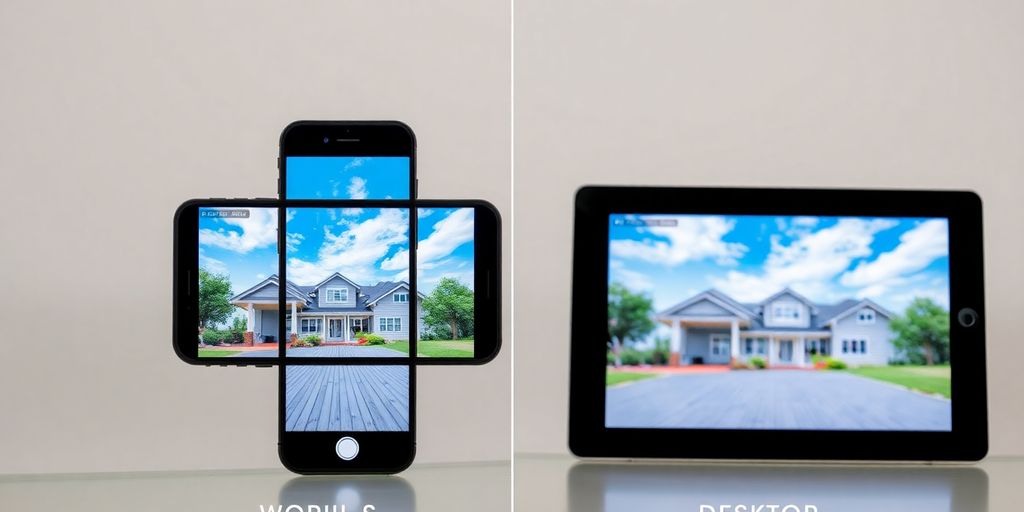
The Impact of Screen Size on Perception
Visual Clarity on Mobile
Mobile devices pack a ton of pixels into a small space, which can make images look super sharp. But it's not always a win. The way we perceive those images changes because of the screen size. What looks great on a phone might not hold up on a desktop monitor. It's all about pixel density and how our eyes interpret the information.
Detail Loss on Smaller Screens
Smaller screens mean less space to show all the details. Fine lines and intricate patterns can get lost or muddled on a phone compared to a desktop. Think about it: a complex architectural shot might look amazing on a big screen, but on a phone, it could just look like a blurry mess. This is why optimizing images for different devices is so important. You want to make sure the key features of the property still stand out, even on a small display.
User Experience Considerations
User experience is key. People browsing on their phones expect a quick and easy experience. If your real estate photos are slow to load or don't display well, they're going to bounce. Make sure your images are optimized for mobile viewing to avoid frustrating potential buyers. This includes file size, resolution, and overall visual appeal. You want to grab their attention and keep them engaged, no matter what device they're using. For optimal mobile viewing, consider the resolution of the image.
Screen size dramatically affects how people see and interact with real estate photos. Optimizing images for each platform is crucial for a positive user experience and accurate property representation.
Here's a quick comparison:
Feature | Desktop | Mobile |
|---|---|---|
Screen Size | Larger | Smaller |
Detail Level | Higher | Lower |
Loading Speed | Less critical, but still important | More critical |
User Engagement | More time to capture attention | Less time to capture attention |
Here are some things to keep in mind:
Always start with a high-resolution image.
Test different resolutions for mobile viewing.
Maintain aspect ratio when resizing an image.
Common Editing Techniques for Real Estate Photos
Real estate photography is more than just snapping a picture; it's about crafting an image that sells a lifestyle. Post-processing is where the magic happens, transforming raw photos into eye-catching visuals. Let's explore some common techniques.
Basic Adjustments
These are the foundational tweaks that every real estate photo should undergo. Think of it as the digital equivalent of a quick tidy-up before guests arrive.
Exposure Correction: Balancing the brightness of the image is key. Too dark, and potential buyers can't see the details; too bright, and the photo looks washed out.
Color Correction: Adjusting the white balance to ensure colors are accurate and appealing. Overcome dull images by adjusting tones.
Straightening: Correcting any distortion, especially when using wide-angle lenses, is crucial for a professional look.
Advanced Retouching
This goes beyond the basics, addressing specific flaws and enhancing the overall appeal. It's like staging the photo to perfection, removing distractions and highlighting the best features.
Object Removal: Getting rid of unwanted items like trash cans, personal belongings, or distracting shadows.
Sky Replacement: Swapping out a dull, gray sky for a vibrant blue one can dramatically improve the photo's appeal.
Adding Light: Sometimes, you need to virtually turn on lights or add warmth to a room that appears too dark or cold.
Maintaining Realism in Edits
While editing can significantly enhance a photo, it's important to avoid over-editing. The goal is to present the property in its best light, not to create a false impression. Potential buyers should see an accurate representation of what they're getting.
Avoid excessive color correction or the removal of significant details.
Adding a bit of contrast and clarity is often enough.
Showcase properties as they are to save time for clients by eliminating those who won’t like such a style right from the start.
The key is to enhance, not deceive.
Optimizing Photos for Different Platforms
It's super annoying when your real estate photos look amazing on your computer but then turn into a blurry mess on your phone, right? Or the colors are totally off? It happens, but there are ways to make sure your photos look good no matter where people are viewing them. It's all about understanding the differences between platforms and tailoring your approach.
Best Practices for Mobile
When it comes to mobile, smaller file sizes are your friend. People are often scrolling on the go, and nobody wants to wait for a huge image to load. Here's what I try to do:
Resize images: Don't send full-resolution images to mobile users. Scale them down to a reasonable size. Something around 1200 pixels wide usually works well.
Compress images: Use a tool to compress the image without losing too much quality. There are plenty of free online tools that can do this.
Optimize for social media: If you're sharing on social media, be aware of their specific image size recommendations. Each platform is different.
Mobile users are often viewing images on smaller screens with varying resolutions and color calibrations. It's important to prioritize fast loading times and visual clarity on these devices.
Desktop-Specific Adjustments
Desktop screens generally offer a better viewing experience, but that doesn't mean you can just upload any old photo. You've got more leeway with file size, but you still want things to look sharp and professional. High-resolution images are key for desktop viewing.
Sharpening: Desktop viewers will notice if your images are soft. A little bit of sharpening can go a long way.
Color correction: Make sure the colors are accurate on a calibrated monitor. What looks good on your screen might look different on someone else's.
Detail enhancement: Desktop viewers will be able to see more details, so make sure those details are crisp and clear.
Cross-Platform Consistency
Ideally, you want your photos to look as similar as possible across all platforms. It's a balancing act, but here are a few things that can help:
Use a consistent editing workflow: Stick to the same editing software and settings for all your photos.
Test on different devices: Check your photos on a variety of phones, tablets, and computers to see how they look.
Consider using a content delivery network (CDN): A CDN can automatically optimize images for different devices and browsers.
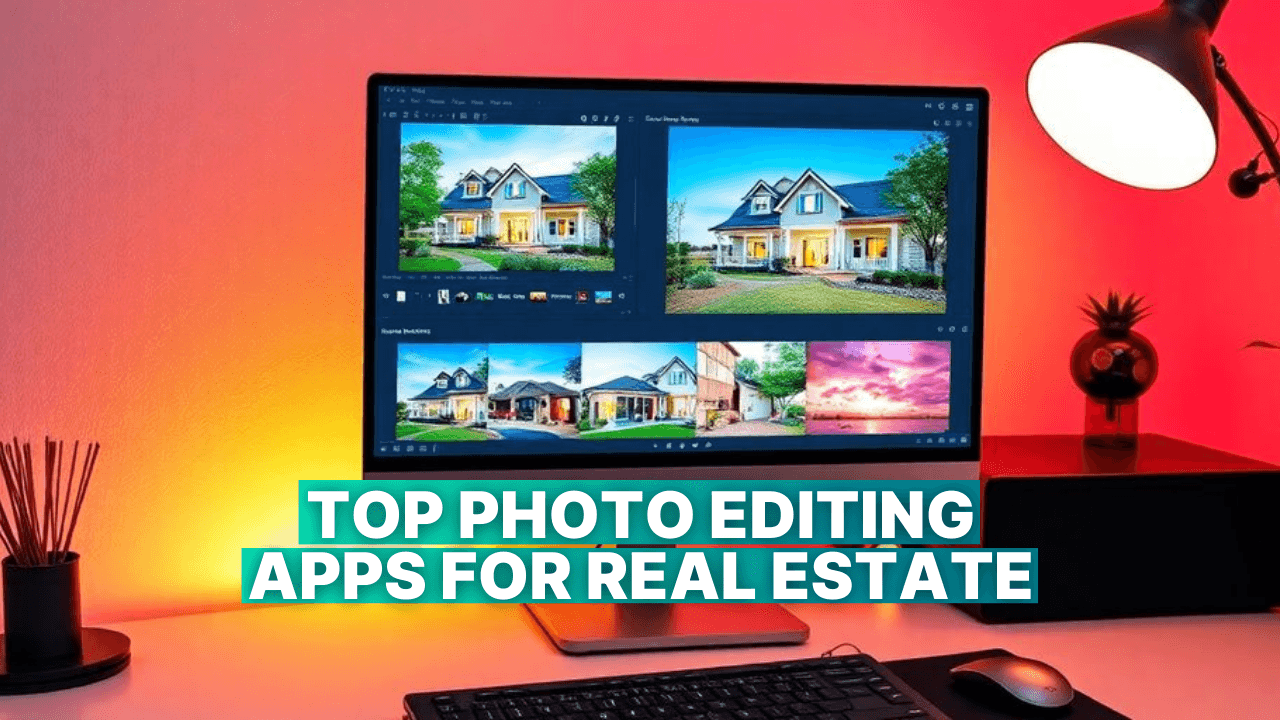
Tools and Software for Effective Editing
Popular Editing Software
When it comes to editing real estate photos, you've got a ton of options. Some are free, some cost money, and some are better suited for pros while others are great for beginners. Let's break down a few popular choices.
Adobe Photoshop: This is like the Swiss Army knife of photo editing. It can do pretty much anything, from basic adjustments to complex manipulations. However, it has a steep learning curve. Realtors taking their own photos might find it overwhelming, but for serious retouching, it's hard to beat. You can use it to adjust brightness and saturation.
Adobe Lightroom: Lightroom is another Adobe product, but it's more focused on photo editing and organization. It's great for color correction, exposure adjustments, and creating HDR images. The interface is a bit more user-friendly than Photoshop, making it a good choice for those who want power without the complexity. It also allows for lens correction to get rid of aberrations and vignetting.
Snapseed: This is a free app from Google that's available on both iOS and Android. It's surprisingly powerful for a mobile app, with a wide range of tools and filters. It's easy to use, loads quickly, and is a great option for editing photos on the go. It even has a healing brush to remove distracting elements.
Pixlr: Pixlr is another free option that's available online. It has a lot of features and is relatively easy to use. It's a good choice if you don't want to download any software.
Mobile vs. Desktop Applications
So, should you edit on your phone or your computer? Well, it depends. Mobile apps are great for quick edits and sharing on social media. They're convenient and often have user-friendly interfaces. Desktop applications, on the other hand, offer more power and control. They're better suited for complex edits and achieving professional-looking results. Here's a quick comparison:
Feature | Mobile Apps | Desktop Applications |
|---|---|---|
Convenience | High | Low |
Power | Limited | High |
Complexity | Low | High |
Best For | Quick edits, social media | Complex edits, professional results |
Example | Snapseed, Adobe Photoshop Express | Adobe Photoshop, Adobe Lightroom |
Choosing the Right Tool for Your Needs
Choosing the right tool really comes down to your skill level, your budget, and what you want to achieve. If you're just starting out, a free mobile app like Snapseed might be a good place to start. If you're a professional photographer, you'll probably want to invest in a desktop application like Photoshop or Lightroom. Consider what features are most important to you and read reviews before making a decision. Also, remember that many programs offer free trials, so you can test them out before committing to a purchase. Experimenting is key to finding what works best for you.
Don't be afraid to try out different tools and see what you like. There's no one-size-fits-all solution, and the best tool is the one that helps you achieve the results you want. Consider your budget, your skill level, and the types of edits you need to make. With a little research, you can find the perfect software for your real estate photography needs.
The Role of Lighting in Real Estate Photography
Lighting is super important in real estate photography. It can totally change how a room feels and looks in a photo. Good lighting makes a space feel inviting and highlights its best features, while bad lighting can make even the nicest place look dull and unappealing. It's not just about making things brighter; it's about creating the right mood and showing off the property in the best possible light. Understanding how to work with light, both natural and artificial, is a key skill for any real estate photographer.
Natural vs. Artificial Lighting
When it comes to real estate photography, you've got two main options for lighting: natural and artificial. Natural light is great because it's free and can make a room feel bright and airy. However, it's not always reliable – the weather can change, and some rooms just don't get much natural light. Artificial lighting, on the other hand, gives you more control. You can use lamps, flashes, and other tools to brighten up dark spaces and create the look you want. The trick is to balance the two. Using too much artificial light can make a photo look fake, while relying only on natural light might not be enough to show off a room's potential.
Editing for Optimal Brightness
Even with the best lighting setup, you'll probably need to do some editing to get the brightness just right. This is where photo editing software comes in handy. You can adjust the exposure, contrast, and highlights to make sure every part of the room is well-lit and visible. It's important to avoid over-editing, though. You don't want to make the photo look unnatural or misrepresent the property. The goal is to enhance the existing light and adjust the exposure, not create something that doesn't exist in reality.
Using HDR Techniques
HDR, or High Dynamic Range, is a technique that can be super useful in real estate photography. Basically, it involves taking multiple photos of the same space at different exposures and then combining them into a single image. This allows you to capture a wider range of light and detail than you could with a single shot. HDR is especially helpful when you're dealing with rooms that have both bright and dark areas, like a living room with a large window. It can help you avoid blown-out highlights and dark shadows, resulting in a more balanced and appealing photo. HDR processing software is essential for this technique.
Best Practices for Real Estate Photography
Staging and Composition Tips
Staging and composition are critical for capturing appealing real estate photos. Start by decluttering each room to create a clean and inviting space. Consider the flow of the property and highlight its best features. Use furniture arrangement to showcase the size and functionality of each area. Pay attention to details like adding fresh flowers or setting a dining table to create a sense of home. When composing your shots, use the rule of thirds to create visually balanced images. Experiment with different angles to find the most flattering perspective of each room. Remember, the goal is to present the property in its best light and entice potential buyers.
Avoiding Over-Editing
While editing is a necessary part of real estate photography, it's important to avoid overdoing it. Excessive retouching can mislead potential clients and create unrealistic expectations. It's better to showcase properties as they are. Focus on making basic adjustments like exposure correction, color balance, and sharpness. Be cautious when removing objects or making significant alterations to the property's appearance. The goal is to enhance the photos without misrepresenting the property's true condition. Strategic lighting can help create the right mood without needing excessive edits.
Showcasing Properties Accurately
Accurate representation is key to building trust with potential buyers. Ensure that your photos accurately reflect the property's features, layout, and condition. Avoid using wide-angle lenses that distort the size of rooms or create misleading perspectives. Capture both interior and exterior shots to provide a comprehensive view of the property. Highlight unique selling points such as updated kitchens, spacious backyards, or scenic views. Be transparent about any flaws or imperfections, as this can help avoid disappointment during viewings. Remember, the goal is to provide an honest and accurate portrayal of the property to attract serious buyers.
Showcasing a property accurately means capturing its true essence and appeal. It's about presenting the space in a way that resonates with potential buyers, allowing them to envision themselves living there. By focusing on honesty and transparency, you can build trust and attract the right buyers to the property.
Here are some things to keep in mind:
Capture the property in good lighting conditions.
Use a tripod to ensure sharp and stable images.
Include a variety of shots to showcase different aspects of the property.
Wrapping It Up
In the end, understanding why real estate photos can look different on mobile versus desktop is key for anyone in the business. It’s all about how images are displayed and the tech behind it. By keeping your photos clear and true to life, you can avoid misleading potential buyers. Plus, a few simple edits can make a big difference without going overboard. Remember, the goal is to show the property as it is, so clients know exactly what to expect. So, whether you’re snapping pics on your phone or using a fancy camera, just keep it real and make sure your images shine on all devices.
Frequently Asked Questions
Why do real estate photos look different on mobile compared to desktop?
The differences in how photos appear on mobile and desktop come from factors like screen size, resolution, and color settings. Mobile screens are smaller and may not show all the details as clearly as larger desktop screens.
How can I improve the quality of my real estate photos?
You can enhance your photos by using good lighting, adjusting brightness and contrast, and making sure the images are in high resolution. Avoid over-editing to keep the images realistic.
What are the best practices for editing real estate photos?
Basic edits include adjusting brightness and color. Advanced techniques might involve removing unwanted items from the photo or adding features like a blue sky. Always aim to keep the images true to the property.
How do I optimize photos for mobile and desktop viewing?
To optimize photos, make sure they are the right size and resolution for each platform. Use formats that load quickly and look good on both mobile and desktop screens.
What tools can I use for editing real estate photos?
Popular tools include Adobe Photoshop for advanced editing and BoxBrownie for specialized real estate services like virtual staging and image enhancements.
How important is lighting in real estate photography?
Lighting is very important! Natural light is ideal, but you can also use artificial lights to brighten up dark areas. Proper lighting can make a big difference in how inviting a space looks.
Have you ever noticed how real estate photos can look totally different on your phone compared to your computer? It’s a common issue that can confuse buyers and sellers alike. In this article, we’ll explore why this happens and share some practical tips to make sure your property images look great on any device. Let’s get into it!
Key Takeaways
Image quality can change based on device resolution.
Screen size affects how details are perceived in photos.
Editing should enhance, not mislead potential buyers.
Different platforms may require specific photo adjustments.
Lighting plays a critical role in the overall look of real estate images.
Understanding Image Quality Differences
It's super common to see differences in how real estate photos look on your phone versus your computer. It's not just you! There are a few key reasons why this happens, and understanding them can help you make sure your photos look great everywhere.
Resolution Variations
The resolution of an image plays a huge role in how it appears on different devices. Desktop screens often have higher resolutions than mobile devices, meaning they can display more detail. When a high-resolution image is viewed on a desktop, it looks crisp and clear. However, when that same image is scaled down for a mobile screen, some of that detail can be lost, leading to a softer or blurrier appearance. It's like trying to fit a lot of information into a smaller space – something's gotta give. If the original resolution isn't high enough, it may lose clarity and appear fuzzy.
Color Calibration Issues
Color calibration is another big factor. Different screens are calibrated differently, meaning they display colors in slightly different ways. What looks like a perfect shade of blue on your desktop monitor might appear more teal or even slightly purple on your phone. This is because each device interprets the color data in the image based on its own color profile. It's not that one is "right" and the other is "wrong," but rather that they're interpreting the same data differently. This is why professional photographers often use calibrated monitors to ensure color accuracy.
Aspect Ratio Discrepancies
Aspect ratio refers to the proportional relationship between an image's width and height. Images that look great on a wide desktop screen might need to be cropped or resized to fit properly on a mobile device, which can alter the composition and overall impact of the photo. For example, a wide panoramic shot of a living room might be cropped to focus on a single feature when viewed on a phone, losing some of the sense of space. When resizing an image, make sure to maintain aspect ratio.
Think of it like this: you're trying to show someone a beautiful landscape painting, but you can only show them a small section of it at a time. They're still seeing the painting, but they're missing the full picture. Similarly, aspect ratio differences can change how viewers perceive the space and layout of a property.
To address this issue:
Start with a high-resolution image.
Maintain the aspect ratio.
Check compression settings.
The Impact of Screen Size on Perception
Visual Clarity on Mobile
Mobile devices pack a ton of pixels into a small space, which can make images look super sharp. But it's not always a win. The way we perceive those images changes because of the screen size. What looks great on a phone might not hold up on a desktop monitor. It's all about pixel density and how our eyes interpret the information.
Detail Loss on Smaller Screens
Smaller screens mean less space to show all the details. Fine lines and intricate patterns can get lost or muddled on a phone compared to a desktop. Think about it: a complex architectural shot might look amazing on a big screen, but on a phone, it could just look like a blurry mess. This is why optimizing images for different devices is so important. You want to make sure the key features of the property still stand out, even on a small display.
User Experience Considerations
User experience is key. People browsing on their phones expect a quick and easy experience. If your real estate photos are slow to load or don't display well, they're going to bounce. Make sure your images are optimized for mobile viewing to avoid frustrating potential buyers. This includes file size, resolution, and overall visual appeal. You want to grab their attention and keep them engaged, no matter what device they're using. For optimal mobile viewing, consider the resolution of the image.
Screen size dramatically affects how people see and interact with real estate photos. Optimizing images for each platform is crucial for a positive user experience and accurate property representation.
Here's a quick comparison:
Feature | Desktop | Mobile |
|---|---|---|
Screen Size | Larger | Smaller |
Detail Level | Higher | Lower |
Loading Speed | Less critical, but still important | More critical |
User Engagement | More time to capture attention | Less time to capture attention |
Here are some things to keep in mind:
Always start with a high-resolution image.
Test different resolutions for mobile viewing.
Maintain aspect ratio when resizing an image.
Common Editing Techniques for Real Estate Photos
Real estate photography is more than just snapping a picture; it's about crafting an image that sells a lifestyle. Post-processing is where the magic happens, transforming raw photos into eye-catching visuals. Let's explore some common techniques.
Basic Adjustments
These are the foundational tweaks that every real estate photo should undergo. Think of it as the digital equivalent of a quick tidy-up before guests arrive.
Exposure Correction: Balancing the brightness of the image is key. Too dark, and potential buyers can't see the details; too bright, and the photo looks washed out.
Color Correction: Adjusting the white balance to ensure colors are accurate and appealing. Overcome dull images by adjusting tones.
Straightening: Correcting any distortion, especially when using wide-angle lenses, is crucial for a professional look.
Advanced Retouching
This goes beyond the basics, addressing specific flaws and enhancing the overall appeal. It's like staging the photo to perfection, removing distractions and highlighting the best features.
Object Removal: Getting rid of unwanted items like trash cans, personal belongings, or distracting shadows.
Sky Replacement: Swapping out a dull, gray sky for a vibrant blue one can dramatically improve the photo's appeal.
Adding Light: Sometimes, you need to virtually turn on lights or add warmth to a room that appears too dark or cold.
Maintaining Realism in Edits
While editing can significantly enhance a photo, it's important to avoid over-editing. The goal is to present the property in its best light, not to create a false impression. Potential buyers should see an accurate representation of what they're getting.
Avoid excessive color correction or the removal of significant details.
Adding a bit of contrast and clarity is often enough.
Showcase properties as they are to save time for clients by eliminating those who won’t like such a style right from the start.
The key is to enhance, not deceive.
Optimizing Photos for Different Platforms
It's super annoying when your real estate photos look amazing on your computer but then turn into a blurry mess on your phone, right? Or the colors are totally off? It happens, but there are ways to make sure your photos look good no matter where people are viewing them. It's all about understanding the differences between platforms and tailoring your approach.
Best Practices for Mobile
When it comes to mobile, smaller file sizes are your friend. People are often scrolling on the go, and nobody wants to wait for a huge image to load. Here's what I try to do:
Resize images: Don't send full-resolution images to mobile users. Scale them down to a reasonable size. Something around 1200 pixels wide usually works well.
Compress images: Use a tool to compress the image without losing too much quality. There are plenty of free online tools that can do this.
Optimize for social media: If you're sharing on social media, be aware of their specific image size recommendations. Each platform is different.
Mobile users are often viewing images on smaller screens with varying resolutions and color calibrations. It's important to prioritize fast loading times and visual clarity on these devices.
Desktop-Specific Adjustments
Desktop screens generally offer a better viewing experience, but that doesn't mean you can just upload any old photo. You've got more leeway with file size, but you still want things to look sharp and professional. High-resolution images are key for desktop viewing.
Sharpening: Desktop viewers will notice if your images are soft. A little bit of sharpening can go a long way.
Color correction: Make sure the colors are accurate on a calibrated monitor. What looks good on your screen might look different on someone else's.
Detail enhancement: Desktop viewers will be able to see more details, so make sure those details are crisp and clear.
Cross-Platform Consistency
Ideally, you want your photos to look as similar as possible across all platforms. It's a balancing act, but here are a few things that can help:
Use a consistent editing workflow: Stick to the same editing software and settings for all your photos.
Test on different devices: Check your photos on a variety of phones, tablets, and computers to see how they look.
Consider using a content delivery network (CDN): A CDN can automatically optimize images for different devices and browsers.
Tools and Software for Effective Editing
Popular Editing Software
When it comes to editing real estate photos, you've got a ton of options. Some are free, some cost money, and some are better suited for pros while others are great for beginners. Let's break down a few popular choices.
Adobe Photoshop: This is like the Swiss Army knife of photo editing. It can do pretty much anything, from basic adjustments to complex manipulations. However, it has a steep learning curve. Realtors taking their own photos might find it overwhelming, but for serious retouching, it's hard to beat. You can use it to adjust brightness and saturation.
Adobe Lightroom: Lightroom is another Adobe product, but it's more focused on photo editing and organization. It's great for color correction, exposure adjustments, and creating HDR images. The interface is a bit more user-friendly than Photoshop, making it a good choice for those who want power without the complexity. It also allows for lens correction to get rid of aberrations and vignetting.
Snapseed: This is a free app from Google that's available on both iOS and Android. It's surprisingly powerful for a mobile app, with a wide range of tools and filters. It's easy to use, loads quickly, and is a great option for editing photos on the go. It even has a healing brush to remove distracting elements.
Pixlr: Pixlr is another free option that's available online. It has a lot of features and is relatively easy to use. It's a good choice if you don't want to download any software.
Mobile vs. Desktop Applications
So, should you edit on your phone or your computer? Well, it depends. Mobile apps are great for quick edits and sharing on social media. They're convenient and often have user-friendly interfaces. Desktop applications, on the other hand, offer more power and control. They're better suited for complex edits and achieving professional-looking results. Here's a quick comparison:
Feature | Mobile Apps | Desktop Applications |
|---|---|---|
Convenience | High | Low |
Power | Limited | High |
Complexity | Low | High |
Best For | Quick edits, social media | Complex edits, professional results |
Example | Snapseed, Adobe Photoshop Express | Adobe Photoshop, Adobe Lightroom |
Choosing the Right Tool for Your Needs
Choosing the right tool really comes down to your skill level, your budget, and what you want to achieve. If you're just starting out, a free mobile app like Snapseed might be a good place to start. If you're a professional photographer, you'll probably want to invest in a desktop application like Photoshop or Lightroom. Consider what features are most important to you and read reviews before making a decision. Also, remember that many programs offer free trials, so you can test them out before committing to a purchase. Experimenting is key to finding what works best for you.
Don't be afraid to try out different tools and see what you like. There's no one-size-fits-all solution, and the best tool is the one that helps you achieve the results you want. Consider your budget, your skill level, and the types of edits you need to make. With a little research, you can find the perfect software for your real estate photography needs.
The Role of Lighting in Real Estate Photography
Lighting is super important in real estate photography. It can totally change how a room feels and looks in a photo. Good lighting makes a space feel inviting and highlights its best features, while bad lighting can make even the nicest place look dull and unappealing. It's not just about making things brighter; it's about creating the right mood and showing off the property in the best possible light. Understanding how to work with light, both natural and artificial, is a key skill for any real estate photographer.
Natural vs. Artificial Lighting
When it comes to real estate photography, you've got two main options for lighting: natural and artificial. Natural light is great because it's free and can make a room feel bright and airy. However, it's not always reliable – the weather can change, and some rooms just don't get much natural light. Artificial lighting, on the other hand, gives you more control. You can use lamps, flashes, and other tools to brighten up dark spaces and create the look you want. The trick is to balance the two. Using too much artificial light can make a photo look fake, while relying only on natural light might not be enough to show off a room's potential.
Editing for Optimal Brightness
Even with the best lighting setup, you'll probably need to do some editing to get the brightness just right. This is where photo editing software comes in handy. You can adjust the exposure, contrast, and highlights to make sure every part of the room is well-lit and visible. It's important to avoid over-editing, though. You don't want to make the photo look unnatural or misrepresent the property. The goal is to enhance the existing light and adjust the exposure, not create something that doesn't exist in reality.
Using HDR Techniques
HDR, or High Dynamic Range, is a technique that can be super useful in real estate photography. Basically, it involves taking multiple photos of the same space at different exposures and then combining them into a single image. This allows you to capture a wider range of light and detail than you could with a single shot. HDR is especially helpful when you're dealing with rooms that have both bright and dark areas, like a living room with a large window. It can help you avoid blown-out highlights and dark shadows, resulting in a more balanced and appealing photo. HDR processing software is essential for this technique.
Best Practices for Real Estate Photography
Staging and Composition Tips
Staging and composition are critical for capturing appealing real estate photos. Start by decluttering each room to create a clean and inviting space. Consider the flow of the property and highlight its best features. Use furniture arrangement to showcase the size and functionality of each area. Pay attention to details like adding fresh flowers or setting a dining table to create a sense of home. When composing your shots, use the rule of thirds to create visually balanced images. Experiment with different angles to find the most flattering perspective of each room. Remember, the goal is to present the property in its best light and entice potential buyers.
Avoiding Over-Editing
While editing is a necessary part of real estate photography, it's important to avoid overdoing it. Excessive retouching can mislead potential clients and create unrealistic expectations. It's better to showcase properties as they are. Focus on making basic adjustments like exposure correction, color balance, and sharpness. Be cautious when removing objects or making significant alterations to the property's appearance. The goal is to enhance the photos without misrepresenting the property's true condition. Strategic lighting can help create the right mood without needing excessive edits.
Showcasing Properties Accurately
Accurate representation is key to building trust with potential buyers. Ensure that your photos accurately reflect the property's features, layout, and condition. Avoid using wide-angle lenses that distort the size of rooms or create misleading perspectives. Capture both interior and exterior shots to provide a comprehensive view of the property. Highlight unique selling points such as updated kitchens, spacious backyards, or scenic views. Be transparent about any flaws or imperfections, as this can help avoid disappointment during viewings. Remember, the goal is to provide an honest and accurate portrayal of the property to attract serious buyers.
Showcasing a property accurately means capturing its true essence and appeal. It's about presenting the space in a way that resonates with potential buyers, allowing them to envision themselves living there. By focusing on honesty and transparency, you can build trust and attract the right buyers to the property.
Here are some things to keep in mind:
Capture the property in good lighting conditions.
Use a tripod to ensure sharp and stable images.
Include a variety of shots to showcase different aspects of the property.
Wrapping It Up
In the end, understanding why real estate photos can look different on mobile versus desktop is key for anyone in the business. It’s all about how images are displayed and the tech behind it. By keeping your photos clear and true to life, you can avoid misleading potential buyers. Plus, a few simple edits can make a big difference without going overboard. Remember, the goal is to show the property as it is, so clients know exactly what to expect. So, whether you’re snapping pics on your phone or using a fancy camera, just keep it real and make sure your images shine on all devices.
Frequently Asked Questions
Why do real estate photos look different on mobile compared to desktop?
The differences in how photos appear on mobile and desktop come from factors like screen size, resolution, and color settings. Mobile screens are smaller and may not show all the details as clearly as larger desktop screens.
How can I improve the quality of my real estate photos?
You can enhance your photos by using good lighting, adjusting brightness and contrast, and making sure the images are in high resolution. Avoid over-editing to keep the images realistic.
What are the best practices for editing real estate photos?
Basic edits include adjusting brightness and color. Advanced techniques might involve removing unwanted items from the photo or adding features like a blue sky. Always aim to keep the images true to the property.
How do I optimize photos for mobile and desktop viewing?
To optimize photos, make sure they are the right size and resolution for each platform. Use formats that load quickly and look good on both mobile and desktop screens.
What tools can I use for editing real estate photos?
Popular tools include Adobe Photoshop for advanced editing and BoxBrownie for specialized real estate services like virtual staging and image enhancements.
How important is lighting in real estate photography?
Lighting is very important! Natural light is ideal, but you can also use artificial lights to brighten up dark areas. Proper lighting can make a big difference in how inviting a space looks.